A Tale of Two Cameras: SONY PXW-FS7 Camera “Review”

Introduction
I was asked by 4KHUB to do a Sony PXW-FS7 review for their site. I have contributed content to 4KHUB.com since it’s launch (and also to ProductionHUB over the years). This time they wanted me to do something a bit more in depth than the general “thoughts on the industry” stuff I’ve done in the past.
The problem is that I don’t really do product reviews. I’m generally more of a nuts and bolts kinda guy and I like to focus on craft. Reviews that cover every product feature and include scientifically based camera chart tests are just not something I regularly do (except occasionally in classroom environments). There are so many other people doing that kind of stuff and they do it so much better than I ever could. That and at this point there are loads of FS7 reviews out there covering what this camera can and can’t do. So, I really struggled with what my approach to this whole “review” thing would be.
As a previous owner of both the Sony PMW-EX1 and NEX-FS700 and a current owner of the a7S, I have a history (and a love/hate relationship), with Sony camera systems. While my current day to day productions are generally shot with Canon Cinema EOS cameras (I own two C100s), and various other camera systems based on the project being produced, I have been drawn to the FS7 since its release. The prospect of a Super 35mm (S35), DCI 4K/UHD/HD camera system (with the PMW-F5’s sensor), along with off speed recording at frame rates up to 180fps in HD and 60fps in UHD/4K, somewhat unique ergonomics, relatively high quality recording options and a street price of well under $10,000 U.S. ($7,999 for the camera body package), were all things that piqued my interest. On paper there’s nothing currently on the market that touches the FS7 in terms of price point & feature set.
That said, in the sub $10,000 range I am intrigued and interested on getting my hands on a the new Blackmagic URSA Mini (with its 4.6K sensor option), when it’s released. Fully built the camera will come in at a price point similar to the FS7 (in the U.S. at least), and it looks like they have finally addressed their dreaded ergonomics issue. The specs won’t match feature for feature but it will probably wind up being the “4K” camera that most people will also consider as a purchase option when looking at the FS7. Blackmagic has yet to release a sensor that is exceptional in low light and I have no idea how the new 4.6K sensor will fare. Additionally, the lack of built in ND filters and no DCI 4K recording option (at least based on release specs), may or may not be deal breakers for some.
I am also very excited about the Canon EOS C300 Mark II. That camera is in a different price bracket and I don’t necessarily look at the C300 Mark II as direct competitor to the FS7 (though many people will). It’s U.S. price point and specs are more in line with the PMW-F5. And, some of its features (especially its AF system and focus controls), are very unique in a large sensor camera system. Some might even say “game changers.” That said, like the URSA Mini, it’s not here yet and only real world use and tests will reveal where it fits into the production landscape. My guess is the Mark II will become another favorite workhorse like the original C300 but will address many of the shortcomings of that camera system with the addition of a new sensor, 4K internal recording and those new AF and focusing features. I, for one, am looking forward to using it on future productions and hope to have the opportunity to do something similar to this article with that camera when it’s available.
OK, enough of that. This thing’s all about the Sony PXW-FS7.
So…
I’ve said it before and will say it again. There is no perfect camera system.
Each camera has its strengths and weaknesses and what may be a strength to one user and/or project may be a weakness to another. That could relate to form factor, recording formats, ergonomics and dozens of other features. The trick is to find the right camera for the job being done or in the case of an owner/operator, the right camera for the types of work being done on a regular basis (with rentals coming into play for the other stuff).
I decided that what I wanted to do here was more of an FS7 “discovery process” rather than a typical camera review. I also wanted to do it from the perspective of how I would wind up actually using the FS7 in production environments for the types of work that I do. My work primarily falls into the corporate, educational and documentary realm with some narrative and commercial work peppered in (the occasional music video and scripted narrative).
The following is really all about finding the camera that I would use inside the FS7. I think that statement will make more sense as you read on.
THE “SONY LOOK”
I’ll admit it right now. I’m not a fan of the “Sony Look”. I know that sounds like a generality but there has been, historically, a certain overall look that Sony video cameras produce. Historically, Sony’s image has felt more “plastic” and pushes a bit too “cool” for me. I personally have felt that they generally don’t have that same organic “film look” that you get from some of the other digital cinema cameras on the market today such as the ALEXA, Amira & Cinema EOS cameras (C100s, C300 & C500), and even the Blackmagic cameras. They all have something in terms of their out of the box look and color science that initially creates an image that is more appealing and filmic to me.
That said, there are many people who love the “Sony Look”. Additionally, when recording RAW or LOG, a colorist or an editor with strong color correction skills can take footage from any modern digital cinema camera and create the exact look and feel that the DP and director wants for the project at hand. It might take some time in post but the data is all there and in skilled hands it can be shaped into pretty much anything. Sony cameras are no exception.
The problem is that I’m neither a colorist nor a skilled color corrector. Most of the work I produce has very quick turn arounds. That’s common on today’s small to medium sized projects that have skeleton crews in both production and post. There’s rarely time for a color correction pass let alone a full color grade. That means I need cameras that are going to predictably give me what I need when we shoot (and a post workflow that’s fast).
That was my main concern with the FS7. Could I use this camera in my normal production environments (very varied), without a lengthy post process? And, could I do it without falling back on that “Sony Look” that I’m not personally in love with? I also wanted to take advantage of what the camera & its sensor had to offer in terms of dynamic range and color reproduction.
I wanted something out of the FS7 that had that organic “film look” aesthetic without working too hard to get it in post. And, I wanted it consistently in different shooting environments.
Was there a way to get that out of the FS7? Let’s jump right into the camera and see.
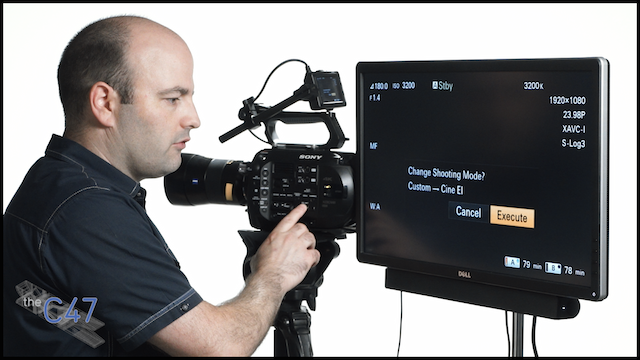
TWO CAMERAS IN ONE?!
If you go into the FS7’s Menu and choose System » Base Setting » Shooting Modes there are two options; Custom and Cine EI (the EI stands for Exposure Index). Choosing one or the other effectively boots up the FS7 as two different camera systems. Sure, the two Shooting Modes are based on using the same sensor block but the usability of the FS7 is quite, almost entirely, different when choosing one over the other. To me, you’re making the choice here between using the FS7 as digital video camcorder (Custom), or a digital cinema camera (Cine EI).
The Custom Shooting Mode in the FS7 is very similar to almost any other Sony camcorder system. You can choose and change pretty much any parameter that the camera has to offer. This is especially true in the camera’s Paint menu where you can choose your Gamma (there are video and S-Log options), and color Matrix (there are currently five options), and then change individual settings related to those which can get very granular in terms of how you are affecting the recorded image. For many shooters this is a desired workflow. Especially if they are pushing out content “to air” on tight deadlines. Once an operator knows their camera, they can start to tweak their gamma and matrix settings so they can get a baked in look which will require very little to no changes in post provided they white balanced and set their exposure correctly.
Choosing different gamma and color matrix combinations in the FS7’s Custom Shooting Mode (and then possibly even tweaking those further in camera), can lead to all kinds of potential headaches in post when color correcting, applying Look Up Tables (LUTs), doing color grades or a combination of all of those. If you don’t really know what you’re doing and what’s happening when you are choosing the various gamma/color combinations in camera you can get yourself into quite the mess in post.
I don’t personally think that the Custom Shooting Mode is always the ideal way to shoot Log on the FS7. Sure, you can paint that picture anyway you want, but to me that’s where things can get messy.
I’m not against the FS7’s Custom Shooting Mode in any way. I absolutely want those options in my camera. But, when you are an owner/operator trying to get the job done or you are in a multi-camera shooting scenario, without a 1st AC and/or DIT, the one thing you want from the get go is simplicity.
Well, with a little education and some real world practical application I found that there is a simple workflow inside the FS7.
CINE EI
The Cine EI Shooting Mode is what gives me the “camera” I was hoping for in the FS7. I honestly didn’t know if it was even in there!
When you choose Cine EI you are effectively booting up the FS7 to be a digital “film” camera. I say “film” as it’s obviously not a true film camera but this, to me, is the start to using the FS7 as a digital cinema camera, not digital video camera in terms of usability and picture. It’s a much more limited “camera” mode in terms of available menu options and for me, that’s a good thing!
OK…
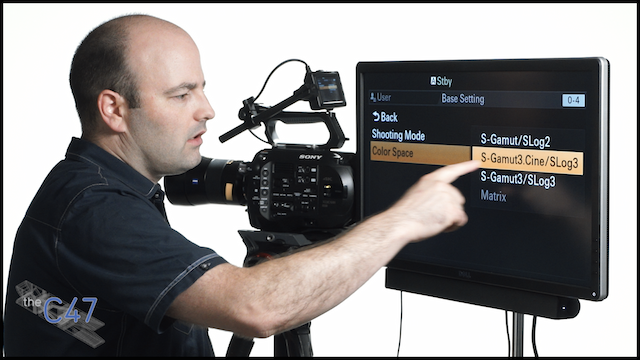
Once you are in the Cine EI Shooting Mode you can then choose your Color Space. This is where you select the color Gamut and Gamma. There are only three options. S-Gamut/S-Log2, S-Gamut3/SLog3 and S-Gamut3.Cine/SLog3. Again, for me, that’s a good thing!
S-GAMUT/S-LOG2 OBSERVATIONS
I have never been completely happy with the S-Gamut/S-Log2 combo (in the a7S at least). This is probably due to my inability to always get the image where I want it to be. I have found some good LUT workflows but it’s rare that I look at the a7S’s image when using this combo and say WOW!
The a7S is still, by far, the best current option for me in a small format camera system, but I don’t always think shooting Log is the way to go with that camera (shooting at a 3200 minimum ISO and over exposing by 1-2 stops for a cleaner image is challenging at times). I have also honestly had mixed results when color correcting my images. There is something about it that I find very challenging to work with and I suspect a lot of that has to do with S-Gamut. In fact, there are times in controlled studio settings where I just turn the Picture Profile to “Off”. Sure, I’m losing dynamic range but I can capture an image that can be used with very few changes in post.
Now, the FS7 has a different sensor than the a7S and that could have an impact on what I can and can’t do with the S-Gamut/S-Log2 combo in the camera. But, based on my prior experience and speaking with others who have shared frustrations I honestly skipped right over the S-Log2 option and looked at the two S-Log3 options as where I was going to start.
“SECRET SAUCE”
I didn’t have any history with S-Log3 when I started this whole FS7 “discovery process”, and it was completely new to me. That means I had no experience using it in both production and post-production workflows prior to working with the camera. While I’ve had ARRI, Blackmagic, Canon and Panasonic cameras on my shoots over the past couple of years (and of course the a7S), for some reason the FS7, F5 and F55 never came into the mix. So, I had to do a little research.
After spending considerable time online going “down the rabbit hole”, I decided that using the S-Gamut3.Cine/SLog3 “Color Grading Space” (color space plus a 1D tone curve), would make the most sense for what I was looking for. S-Log3 looked to be an advance in terms of a logarithmic gamma curve for Sony and the S-Gamut3.Cine Color Gamut looked to be a big part of the “secret sauce” in terms of a captured image that would be easier to work with in post. Color gamut is what determines how your colors are “mapped” when recorded. S-Gamut3.Cine is larger than the DCI Gamut but its color range is more conducive to Rec709 workflows. In simple terms it puts the colors “where they should be” for the types of work we are normally working on today for TV, web and digital cinema distribution.
I personally believe that RAW should generally be left to the DITs and Colorists of the world (with a dedicated media manager on set as almost a necessity). RAW workflows require a debayering step before you can start to work with the footage (to put it in a “video” based format), and RAW also generally has tremendous “overhead” in terms of storage space in both production and post. There are great compressed RAW workflows available from companies like RED and Sony but what I want today is a good Log/Gamut combo that is tuned to create great film like images in a camera that has great dynamic range.
In my opinion, it’s the gamma and gamut combo (along with the camera’s sensor), that make up the real base for what you can do with an image (in Log based workflows). Of course the camera’s dynamic range, recorded bit depth and compression also factor in.
So, does the FS7’s S-Gamut3.Cine/SLog3 combo work in the real world? Is it, for me, the FS7’s “Secret Sauce?”.
The answer is a resounding “yes.” But, to use this base “recipe” successfully I think you need to understand how to work with Look Up Tables (LUTs), in both production and post to get predictable images. Of course, there are many exceptions to this as there are productions with dedicated Digital Imaging Techs (DITs), and professional colorists. They may or may not use LUTs in their workflows. That said, most of us don’t have these specialists on the majority of our projects (or any of them). But, we still want to take advantage of what a combination like the sensor in the FS7, its recording formats and S-Gamut3.Cine/SLog3 can give us. 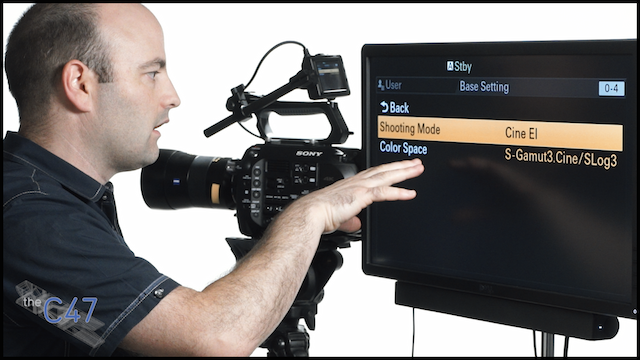 So, we need to learn to work with LUTs in both production and post.
LOVE YOUR LUTs
What do LUTs do? Well, in a nutshell LUTs are mathematical conversion formulas that take the values of pixels in source images and changes them to values that look like something else (usually to emulate a specific film stock, different film looks or even another camera’s Log to Rec.709 look). They can be applied to just preview how the footage might look once color corrected and/or graded (the recorded image will remain Log), or they can be “baked” right into the recorded image. I occasionally “bake” a LUT into my image when handing over footage to clients that wants to do very little to the image in post.
I should state right here that LUTs are not a complete solution for full color correction and/or grades but they can be a very powerful tool in both production and post in helping you get your final image to where you want it to be.
Working with LUTs is actually pretty straightforward. On the FS7, in Cine EI, it’s dead simple.
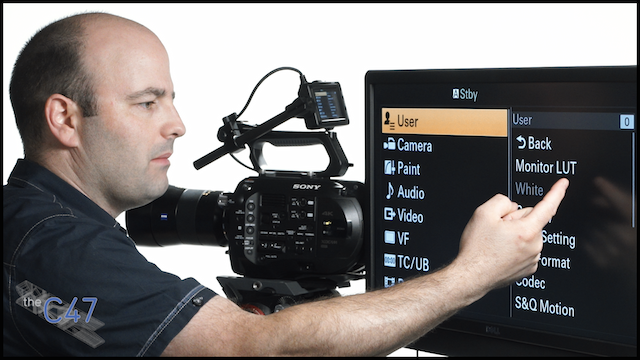
Under Monitor LUT » Category there are three choices. LUT, Look Profile and User 3D LUT.
The LUT category has a number of 1D LUT options but, for me, they don’t give me an image that I would generally want to recreate once color correcting my footage in post. They are generally too contrasty and just not what I’m usually going for. Some people, however, like them for specifically those reasons when shooting. 1D tone curves like the 800% 709 curve can be good for run and gun as they can quickly show potential exposure issues. I personally prefer to use scopes and the hi/low key feature in the FS7 (covered later in this article), as I want to monitor an image closer to what I am going for in post.
The User 3D LUT category is for accessing 3D LUTs that you load into the camera. This can be a great option if you have a favorite LUT or LUTs that are already tuned to your specific camera’s sensor (the FS7 in this case), and a specific Log/Gamut combo in that camera. I have LUT plug-ins like Koji Advance, Osiris and ImpulZ which all have some really fantastic LUTs that I am using in post. Not always, but for certain projects and/or shots.
Still pulled from 180fps fooatge (Pre-LUT)
 Exposure Adjustments and LUT Applied (Koji Advance)
I am also playing with LUTCalc and continuing to delve into articles and info from the likes of Alister Chapman and Art Adams who are both great resources of information. They may go about what they do differently but that’s the whole idea. You need to find the right workflow for you and the types of work you produce. Art Adams is on a quest and you should definitely search for some of his latest articles on the subject. He even has a new AA709A LUT that he has created that I’m looking forward to taking for a spin on an upcoming job.
I personally think that using the LUTs and Looks that are already built into a camera can make projects run much smoother. I used to be a big fan of creating custom picture settings, looks and LUTS for cameras on jobs but I have found that it’s time consuming and it can lead to problems if they aren’t copied over properly, cameras are reset, etc. If you can find a LUT that is always in there, it will make working from job to job (especially on multi-cam projects), SO much easier. Remember, keep it simple.
So, that brings me to the third option.
Inside the Look Profile Category are Sony’s own customized LUTs that are designed to work with their Log gammas. This is where I found my “everyday” shooting LUT for the FS7.
With Look Profile selected you go to the Look Profile Select options and there are four choices. It’s number 2, LC-709typeA, that’s the “Neo” for me.
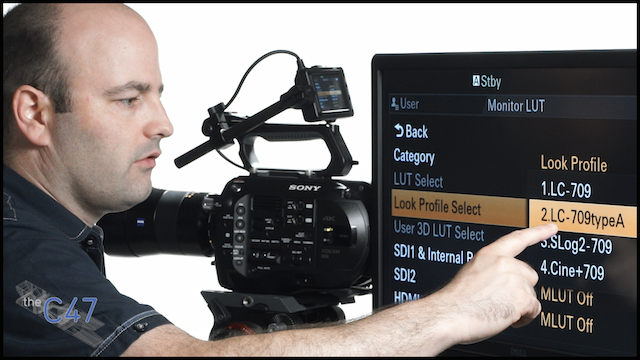
The LC stands for low contrast, the 709 means it’s putting the footage into a Rec.709 color space and I’m pretty sure the A designates something that emulates an ALEXA based look (though the A could stand for Art Adam who has given Sony a lot of input over the years, including in this area). Basically it’s an ALEXA-like Log-C to Rec.709 emulator.This was the final ingredient, for me at least, in being able to create a production to post workflow that was simple. This was the recipe to creating images that I liked consistently with the camera.
Pre-LUT

Post-LUT
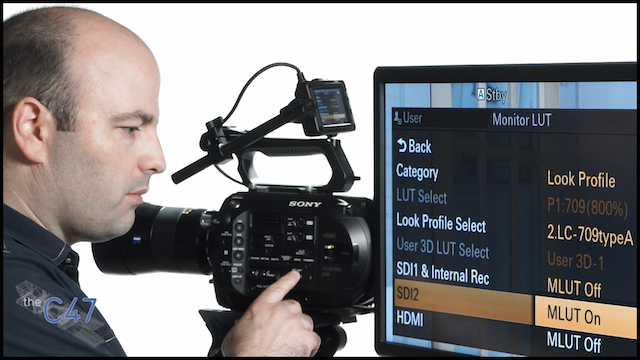
With the camera set up to shoot you go into the Monitor LUT menu turn the MLUT on or off. If you are using the FS7’s Viewfinder then that’s what you would turn on. If you are using an external monitoring device then you would generally choose SDI2 or HDMI*. If you choose SDI1 & Internal you will “bake” the LUT into your recorded image on the XQD cards and anything connected to the SDI1 port. That’s generally not what you’d want to do unless you had to get stuff out the door right away or were handing it over to a client that didn’t plan to color correct or grade the footage.
>
*Note: There are some gotchas in terms of when you can and can’t see and use the MLUTs on anything other than the FS7’s Viewfinder that are based on the cameras Rec Setting and the Video menu settings for Output On/Off, Output Format, Output Setting and Output Display. I cover some of this information in the video for this section but refer to the FS7’s user manual for more information.
So, what else do you need to know?
How to expose your image correctly using Log gammas and LUTs!
LOG AND LUTS
Once you have chosen your Monitor LUT you need to get comfortable with using Log gammas, a waveform monitor and a LUT to judge exposure. It’s one of those things you have to do for it to really “click.”
I have experience working with Log in both production and post. The biggest thing to make sure of when exposing your image is to know what the manufacturer’s recommend values are in terms of exposure points for their various Log gammas. In time you will also learn when and in what situations to ignore those recommendations.

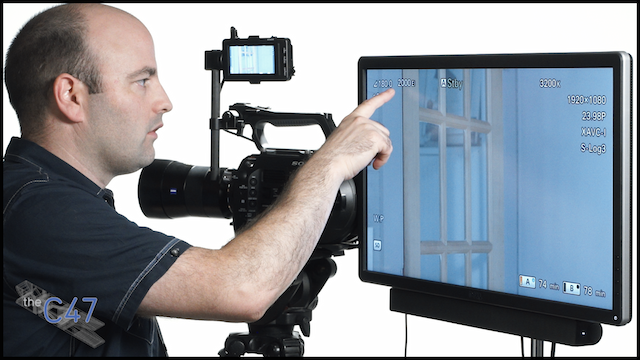
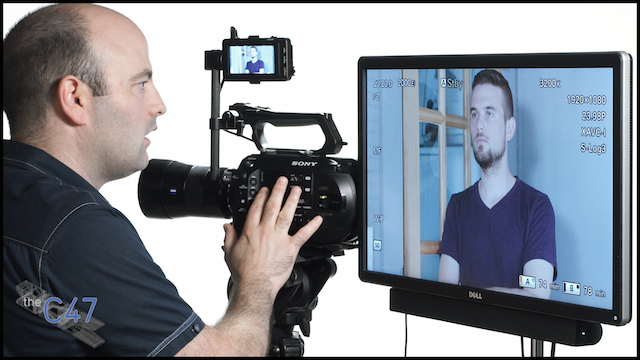
As you can see in the above chart, Sony recommends that when using S-Log3 that you expose 18% Grey or Middle Gray at 41% on a waveform monitor. That’s a good place to start. One thing you should also be aware of is that when using CINE EI on the FS7 your image will ALWAYS be recorded at 2000 ISO. Sony feels that’s the “sweet spot” in terms of dynamic range and for getting the most out of the camera.
I generally have the MLUT set to off to begin with and try, if I can, to get an 18% middle gray card into the frame. Then I make adjustments in terms of lighting, aperture, etc., and once I know that I’m in the ballpark of where my exposure should be (I also look at where my white point and highlights are sitting), I turn on the MLUT. Then it’s really time to shoot!
The trick at this point is to trust what you’re seeing with the MLUT applied. It can take getting used to but if you tweak your exposure to get an image you like then when you apply the same LUT in post you will see effectively the same image. Remember, that as long as you didn’t “bake” the LUT into the recorded image you will actually have much more data in there than the LUT is showing you. But, it will really help you see what you’re going to wind up with in the Rec.709 world we currently live in.
Quick Tip: I put Monitor LUT at the top of the User Menu in the FS7 so I can access it quickly when I need to turn my LUTs on and off. I wish I could assign a button to do that but, alas, that isn’t an option.
The post side is a deep one and there are many other options you have once you get to that stage of a project. I’m not going to get into that stuff here but needless to say you can use different LUTs, no LUT at all, apply power windows to fix high contrast shots (as long as you didn’t clip your highlights or crush your blacks), and a slew of other things. With properly exposed Log footage and a 10-bit recording, it’s pretty forgiving for the majority of work I’m doing. I’m not shooting huge features so, again, RAW is not my current workflow. What I’m getting from the camera’s recorded image is good enough for the vast majority of projects that I do.
Note: Some will argue that Cine EI has disadvantages over the Custom Shooting Mode as there are no noise suppression options, no ability to dial in a specific ISO and no ability to dial in an exact color temperature for a custom white balance (you can choose 3200K, 4300K and 5500K presets). While these can be viewed as disadvantages, I actually find these limitations quite liberating. It makes the camera simpler to use. I would, however, like some additional preset color temperature options that I could assign to the white balance switches even though I have had footage from the FS7 that was shot in daylight with the 3200K preset with no visible “hit” to the image once corrected.

Still From Original Log Footage (3200K Preset)

LUT Applied (No Color Correction)
LUT Applied and Color Temp Adjustment
EXPOSURE INDEX & RATING YOUR CAMERA
 While CINE EI always records your images at 2000 ISO, there are ways to “rate” your camera at a different Exposure Index when recording Log and using MLUTs.
 Why would you do this?
Well, as with other manufacturer’s Log based workflows and exposure point recommendations, the above percentages don’t always translate to the cleanest possible image in post (especially in the shadows area). Their recommendations might give you the safe formula to record the maximum number of stops of dynamic range that the camera can give you but once you start to color correct and/or grade your image you might find that there is more noise in the image (usually below middle gray), than desired.
Basically, manufacturers tend to rate their cameras for maximum dynamic range (favoring more stops above middle gray to protect highlights). That said, each scene needs to be evaluated by the user as they may want more stops below middle gray when they know highlights are being protected in the scene and they want more in the shadows area of an image.
When you “rate” the FS7 using CINE EI mode at a different Exposure Index (either lower or higher than the base 2000), you are doing so to either favor details in the shadow areas which lowers the apparent noise in darker areas of the image or by capturing more highlight information at the expense of more noise in the shadows (after the image has been corrected or graded in post).
As a result of not wanting noise in the shadows of an image, it’s a common practice to “overexpose” a Log based recorded image by as much as 2 stops so that when do your exposure adjustments in post (often the first step when working with Log footage to get your shadows, mids and highlights where you want them), you aren’t lifting your mids and highlights so much as to then add noise into the shadows area of your image as you make adjustments. The image you bring into your NLE or grading software will appear overexposed but, again, as long as you didn’t clip your highlights the information will be there in the recorded image.
Now, this “rating your camera” stuff is really a “you have to do it in the real world to get it” workflow with the FS7.
While the camera will always record at 2000 ISO when in the CINE EI Shooting Mode, you can change the camera’s Exposure Index (EI), value so it appears that your camera is shooting at a higher or lower ISO when using an MLUT.
You can do this by going to Camera » ISO/Gain/EI and then assigning an Exposure Index value to the EI<H>, EI<M> and EI<L> options in the menu. These correspond to the L, M and H switch positions on the left side of the FS7’s camera body.
If you want to match the recorded ISO (2000), with the EI, make sure you assign 2000 EI to either the L, M or H switch (for me it is always assigned to the M position). With your MLUT turned on and the L,M, H switch in the position you assigned 2000 EI you should then see 2000EI in the top left corner of the display of the display.
With this setting you will have a direct production to post match when you apply the LUT to your footage in an NLE or color grading software (in my case LC-709typeA). I will note that I always apply an exposure correction as the first part of the “chain” in terms of the order of operations for color correction/grading, before the LUT. This is true when matching the EI to the recorded ISO or when rating the camera at a different EI.

Still from Log Footage (notice words on page right side of frame)

LUT without any Exposure Adjustment BEFORE Applied (notice blown out part of page)

LUT Applied with Exposure Adjustment BEFORE the LUT (Correct Order of Operations)
In most situations when you rate your camera to an Exposure Index other than the native ISO you want the EI to be lower than the base ISO that is being recorded (especially when that base is 2000). You do this by choosing a value such as 1000 EI or 500 EI (1 and 2 stops under the native ISO).
Camera Rated at 2000 EI at f/2
Camera Rated at 1000EI. Still at f/2
Camera Rated at 1000EI at f/1.4
Once assigned, and chosen, this is where it gets a bit tricky. If you, for instance, chose 1000 EI your MLUT image will appear a stop darker in the Viewfinder/Monitor. The recorded image will still be 2000 ISO but to make the image look right you will open up the aperture of your lens by a stop. This will “overexpose” your recorded image by a stop but will look right in the viewfinder with the MLUT applied.
Now, when you do this you are of course shooting with a shallower depth of field. This might or might not be a problem. You just need to know that’s part of the deal. Also, when you shoot this way (rating your camera at a different EI), you will have to apply an exposure correction before you apply the LUT. This will give you the control you need to get the image to where you want it to be in terms of exposure.
You can also rate your camera at a higher EI. For instance, you could rate it at a 4000 EI which would be a stop over the base ISO. Why would you do this when you could potentially introduce more noise into the image when you color correct and/or grade the footage? Mainly because you are shooting in such low light conditions that you will probably have to adjust the final exposure by that much anyway and the Log/LUT workflow makes it much easier for you to see what the final product is going to look like (or close to it). Situations like this (extreme low light), might also be a good place to using the Custom Shooting mode as you can use noise suppression and just change the ISO (at the expense of a change in terms of where those 14 stops of dynamic range will fall). I would personally still stick with Cine EI as I can use the S-Gamut3.Cine Color Gamut and LUTs which are not available in Custom.
Note: Some people will also use “exposure compensation” versions of their LUTs in post (I wouldn’t use them in production). These are LUTs that take into consideration the over or under exposure ratings that were used on the camera and can be, for some, a great first step to working with their footage as it will automatically apply the exposure adjustment so the footage looks right without applying an exposure correction before the LUT is applied. It’s not a replacement for that first exposure correction or node but it could be handy when showing a client footage on set or just going through dailies. I am learning to use LUTCalc and it seems that could be a great tool for creating exposure compensated versions of a LUT.
This is quite the “rabbit hole” to go down and is as much as I want to get into it in this article. It’s definitely something you can research and look into yourself as there may be advantages to using these exposure compensation versions of LUTs for the way you like to work with the FS7 and other camera systems that work in a similar way.
I apologize if this is all a bit confusing. It’s confusing to me when I haven’t done it for awhile and also when I try to explain it to someone verbally without having the camera and a computer there to show them exactly what is happening. It is definitely something you need to do for yourself to really get it.
Hi/Lo KEY FEATURE…
There is also one other really cool feature in the FS7 that can help you when using MLUTs as it can be almost impossible to really see what the actual Log based recording is giving you when MLUTs are applied.
This is the Hi/Lo Key feature.
I use the Assignable Button feature on the FS7 to assign Hi/Lo Key to one of the 6 available buttons on the camera (only 3 are available if you are using the body only without the Grip Remote Control).
What Hi/Lo Key does is toggle between High Key and Low Key views of your image when you have an MLUT on. High Key focuses on the highlights in your image and can give you confidence that the recorded image is protecting them. Lo Key does the same but for the shadow areas of your image. If you can’t see the detail you want, then adjust your exposure until you do. It’s kind of a brilliant thing to have. I think it’s a great feature that some people will use all the time. Others will toggle their MLUT on/off and use the waveform monitor for confidence or use an external monitoring device with scopes applied all the time.
THE OTHER STUFF
As I said at the beginning, this isn’t a camera review. I didn’t plan on covering every feature and menu on the camera. All that stuff is in the PXW-FS7 manual and covered in extensive written and video based reviews that are readily available elsewhere. There are, however, some additional things I do want to briefly touch on in regards to using the camera in the real world.
LENSES & MOUNTS
The lens mount on the FS7 is both a blessing and a curse. On a recent production we seriously considered using the FS7 for a narrative project. We knew the camera had the dynamic range we needed and it was potentially a contender. The deal breaker was the lens mount. The DP on the project was using his set of PL mount lenses and I didn’t feel confident enough with using a PL to E-mount lens adapter (even with shims). We were going to fly the camera on a Steadicam with the 1st pulling using a wireless follow focus system. There was no room for error so we rented an ALEXA package. The F55 was seriously considered but the ALEXA was a camera the DP, 1st and 2nd ACs were most familiar with and it made the most sense for that project.
With the above said, the e-mount on the FS7 (and cameras like the a7S and a7R Mark II), are extremely versatile. There are not only a growing number of native e-mount lenses being designed and produced by Sony and other manufacturers (notably Zeiss), it is an extremely easy mount to adapt lenses from the likes of Canon and Nikon. This is due to the shallow flange depth of the mount (which has very little distance to the sensor), so manufacturers can create lens adapters that account for a particular mounts flange depth so that those lenses can be used. Metabones is probably the most well known of the lens adapter solutions out there but there are others and choices are many. Except for PL Mount applications I would feel pretty comfortable using adapters on productions. You’ll just need to do your research and really test them before shooting. The biggest issue being potential backfocus issues. When repeatable focus pulling is necessary you may want to stick to native e-mount glass (such as e-mount based Zeiss CP.2s), or consider a different camera system. Remember, there is no PERFECT camera system for everything.
Note: I find that the 24-70mm f/4 ZA OSS Lens from Sony is OK for some applications. I’m not a big fan of focus-by-wire lenses (that’s an understatement), but it gets the job done for things like interviews, shooting b-roll and some run and gun situations especially when shooting between and f/4 and f/8 (you can also use Sony’s Steady-Shot lens stabilization with the lens). It’s not even close to my first choice for a still lens but it can work well for video applications if you can get by the frustrations of trying to manually focus with this type of lens system.
I find that EF mount lenses with a good lens adapter are a good choice for production. On a shoot I just wrapped we used both the Speed Booster and Mark IV versions of the Metabones EF to E-mount adapters. They worked out well and if you have lots of EF mount glass then adapters are a great way to go. The Commlite adapter in the video is OK. It does seem to have an issue though in terms of being able to open the lens all the way up to it’s full aperture. It’s an inexpensive option but I would go the Metabones route if investing in an EF mount adapter for this camera.
28-135MM “KIT” LENS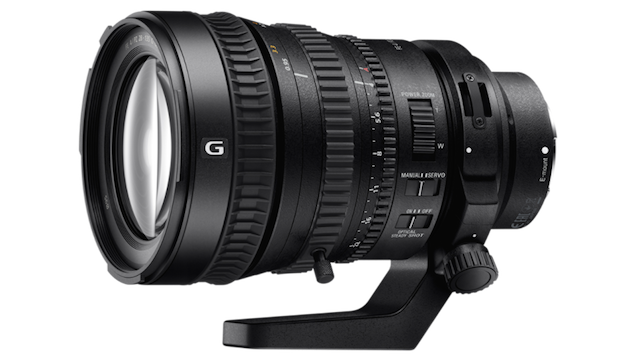
The Sony FE PZ 28-135mm f/4 G OSS e-mount lens will be right for some and not for others. It has some interesting features and at just under $2,500 U.S., for what it is, it could fit nicely into some camera bags for people using the FS7 and cameras like the a7S. Why the a7S? Because the lens was also designed for full-frame cameras for both HD and 4K productions.
It’s a nice lens (with key features covered in the video), but I do have some issues with it.
The first issue is that there are no focal length markings on the lens barrel. For me that’s a big no no on a lens that is being promoted as a cost effective 4K cinematography lens. I’m not sure what the reason is for this but the combination of no markings and also only seeing a zoom level or zoom bar in the camera’s display (as opposed to focal length readings), makes it very difficult to use this and other Sony lenses in many shooting scenarios. We are used to seeing the focal length readings on many cameras nowadays so it’s frustrating to not have that, to say the least.
The second has to do with the lenses zoom functionality. The lens is par focal so once you zoom in and get focus it will keep it focus when zooming in and out. But, the lens is sloooooow! And in this case by slow I’m not referring to maximum aperture. I mean that it’s impossible to snap zoom with the lens. That’s a problem for a lot of shooters. The zoom lens lags. It has a pretty significant “delay” when you use it for any big changes in focal length.
The third is the focal length range itself. On an S35 sensor, 28mm is just not wide enough for many productions. On a crop sensor camera like the FS7 I think that at least 18mm is what’s needed on the wide end to make it useful in lots of applications. The whole idea of a lens like this, to me, is that it can be used as the lens that “lives on my camera” for a wide variety of stuff. I understand that to keep the size of the lens similar to what it is they would have to limit the focal length on the long end of the lens but I would much rather an 18-90 or 100mm lens than a 28-135mm lens on a camera like the FS7.
There’s no deal if you buy the Kit version of the FS7 which is the camera body and lens together. As a result, I would recommend buying it separately from the camera and would also suggest renting the lens first so you can determine if you would use it on lots of productions. In some ways I think the lens is more versatile on a camera like the a7S. The wide end of the lens is just wide enough on a full-frame camera.
XCDA-FS7 EXTENSION UNIT
At just under $2000 U.S., the XDCA-FS7 Extension Unit gives the camera a lot of additional functionality. While I’d love to see a timecode port directly on the body of the FS7, you’ll need this Extension uUnit to get it. It also adds a bunch of other features (including powering solutions), but for me it’s the timecode port, ProRes transcoding and the ability to output RAW that are the most interesting.
On our recent shoot we had two FS7s and the Extension Units pretty much lived on the cameras all the time. When we were recording HD (which was about 90% of the time), we recorded ProRes 422 directly to the internal cards. We also did some UHD recording and wound up transcoding that footage in post to “equalize” everything to the same codec.
It should be noted that once the Extension Unit is attached you have to use V-Lock Mount batteries to both power the Extension Unit and the camera. It’s an additional investment but larger battery units are pretty standard on today’s shoots and if renting they are inexpensive.
The FS7 Extension Unit will be a must-have for many shooters (especially ones in multi-cam run and gun & live event situations). For others it might never be needed. I think that for the features it provides it’s priced fairly and will be sitting on the back of many FS7s.
RECORDING CODECS
I have used both the XAVC-I codec on the FS7 and, as mentioned above, used the Extension Unit to record ProRes files directly to the XQD cards.
Based on my experience with the XAVC-I codec I wouldn’t feel compelled to use ProRes all the time as I was very happy with what I was getting from the XAVC-I files when working with them in FCPX (both with HD and UHD), on a late 2013 Macbook Pro. I’ve also heard good things about XAVC-L for longer record times (the long GOP flavor of XAVC), but I didn’t use that at all. I also didn’t personally do any RAW recording. I think RAW would be great for bigger projects using the XDCA-FS7 to something like Convergent Design’s 7Q+ but I would really start to consider other cameras like the ALEXA, F55 and C300 Mark II if I were looking to go to the RAW route.
AUDIO SOLUTIONS
With firmware version 2.0 and higher you now get 4 channel recording capabilities in the FS7. With the XLR-K2M (under $600 U.S.), you can add two XLR inputs into the camera using the FS7’s Multi-Interface Shoe Output Connector. That means no additional batteries or cables. The K2M is powered by the “smart shoe” and also passes the audio into the camera that way.
I’m a big fan of the K2M. It can also be used with camera’s like the a7S to get balanced audio into the camera and all the audio controls on the unit are buttons, dials and switches so you don’t have to go into the FS7’s Audio menu to make changes (like you do with the built in XLR inputs). In fact, I would get the K2M even if I were only doing two channel recording so that I had access to all those audio controls on the outside of the FS7’s camera body instead of having to go into the Audio menu to change things.
I have also been using the Sony’s UWP-D11 wireless transmitter/receiver system with the FS7 and I’m very, very happy with its performance. They have replaced my Sennheiser G3 system for my productions.
You can also get the optional SMAD-P3 Multi-Interface Shoe Adapter for about $50-60 U.S. to use with the UWP-D system so you don’t have to use batteries or additional cables to pass the audio data to the camera. Anytime I can eliminate a cable (especially with confidence), that makes me happy.
All in all, the audio support in FS7 is strong. I don’t feel like options are lacking in this department and it’s nice to see that as I had some issues in this area when I owned an FS700. The pre-amps seem to be quite good and on par with other cameras in this price point. Not a Sound Devices pre-amp but it will absolutely get the job done on a production.
Quick Tip: When using the SMAD-P3 turn off GPS in the camera. They don’t play well together and you will hear intermittent tones that can be recorded.
SHOOTING WITH THE FS7 (RIGGING)
I find myself using the FS7 in two different ways.
The first way is a slightly modified version of the out-of-the box configuration. While the camera was designed to be used as a shoulder mounted camera (similar to 16mm film cameras), the reality is it needs some minor tweaking to really be used that way (for me personally at least). Many people will also find they will need a full rig to get the camera into a form factor they are comfortable with for their shooting style. I do own a Zacuto Next Gen Recoil system that I use with one of my C100s but after trying it with the FS7 I actually felt that for my body size and the way the FS7 was configured that I didn’t wind up using it with this particular camera. It could be the perfect fit for other people though and I love it with my Cinema EOS cameras!
I have replaced the standard 15mm rod that the monitor/evf unit attaches to with a longer version that allows me to position it in a more comfortable place. It’s too short otherwise and it will create neck strain for most people (it’s why I replaced it). I have also removed the microphone shock mount. It started to become loose and I don’t mount mics to my cameras very often anyway. The K2M unit comes with one anyway so if I wanted to have a camera mounted microphone I could use that or I would attach a much better shock mount (Rycote), and a mic like the RØDE NT55 (my go to on camera mic if I’m going to use one).
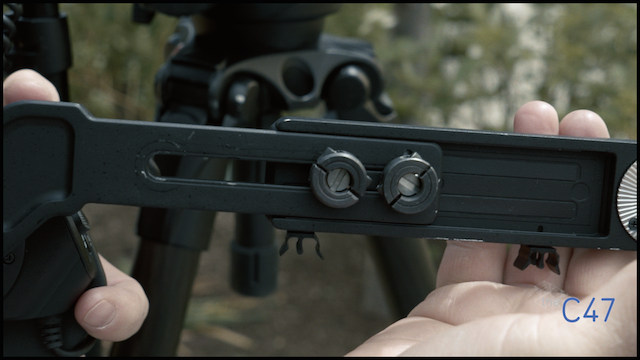
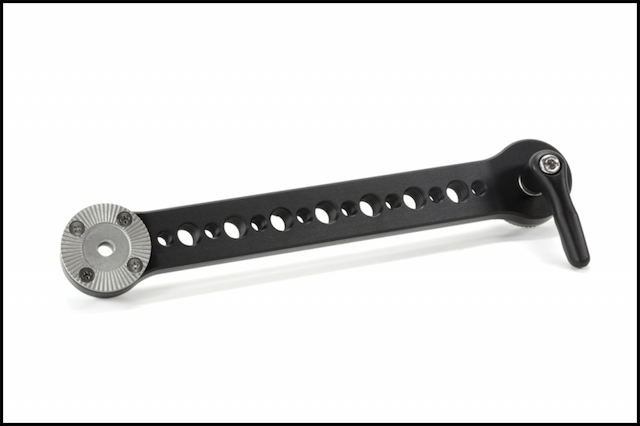
In terms of additional rigging, I have made a tool less modification to the Grip Remote Control’s arm so that I can change it’s length without having a screwdriver handy. I cover this in the video for this section. It took some time to find what I was looking for but it only cost me about $15 U.S. and it makes adjusting the arm SO much easier in the field. I am also using the long Rosette Arm from Wooden Camera so I can really get that Grip where I want it. That’s in the video as well and I feel it’s essential to the kit.
The second way I have the camera configured is without the Grip attached at all. I actually like using the camera this way and I reconfigure the Viewfinder to sit on top of the handle. I then attach a small Rosette Arm (also from Wooden Camera), so I have something to grip in this shooting configuration. This is also shown in the video. If I were going to shoot this way a lot I would probably invest in a wooden grip to attach to the ARRI rosette connection on the other side of the small rosette arm.
All in all, I’m happy with the ergonomics of the camera. It’s also built well and it's a solid piece of kit. There are, of course, modifications that each shooter will make to suit their shooting style but the “bones” are there.
A NOTE ON SHOOTING UHD & 4K 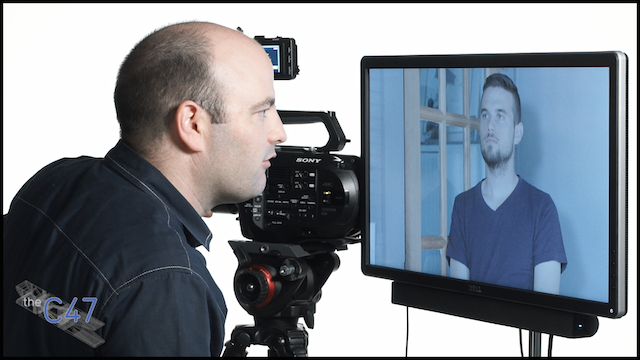 While this article is largely focused on how to use the FS7, it shouldn’t be forgotten that is both a UHD and DCI 4K based camera system. Lots of people will continue to shoot HD footage with the FS7 but obviously it’s 4K recording capabilities are a big part of this camera.
If you’re not used to shooting at these higher resolutions (3840 x 2160 and 4096 x 2160), getting tack sharp focus can be a challenge. If you rely only on the FS7’s small monitor you may find some surprises in post. Peaking is essential but the expanded focus on the FS7 isn’t great. It reminds me of the FS700 and it’s really hard to judge whether you are in focus or not.
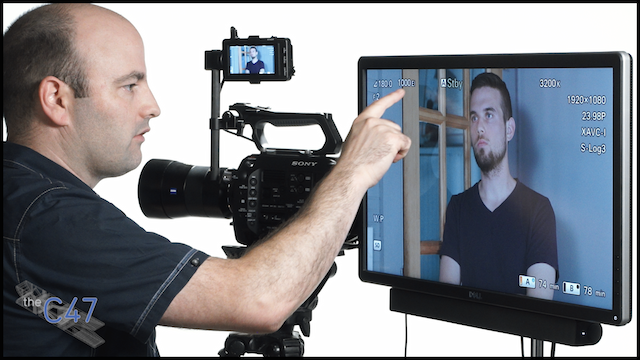
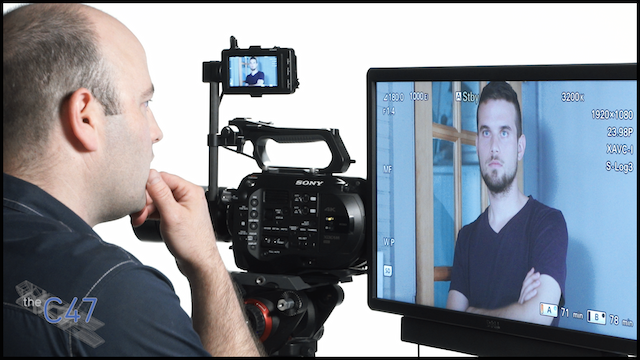
If you’re shooting DCI 4K or UHD a lot, my recommendation would be to get an external monitoring solution. I use the Gratical HD, Atoms Shogun and I also just recently picked up the Dell P2415Q which is a 24” UHD monitor (recommended by my good friend Dan Chung at NewsShooter.com).
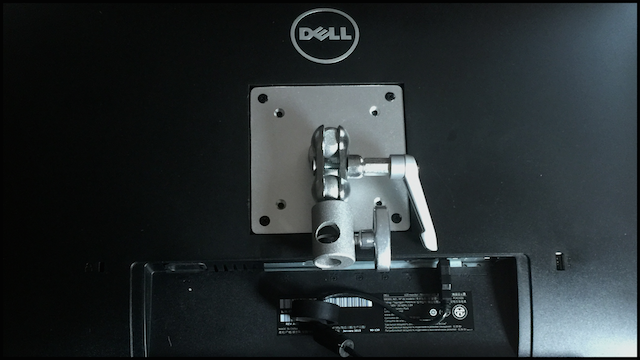
I have also added a Kupo VESA mount monitor adapter (to mount to a C-Stand), and use the ROCCAT Tusko monitor bag to transport the Dell P2415Q (essentially a gamer’s monitor bag/case). The whole kit was about $550 US and I am much more confident now when framing up and getting focus for shots. It’s not a replacement for a true calibrated monitor and it doesn’t have focus assist tools but it’s cost effective solution to nailing focus at higher resolutions.
A/B/C CAMERA SCENARIOS
As an owner of the a7S I was originally thinking that the FS7 and a7S might be a good A/B camera combination. They are both great in low light, have high dynamic range and can both record in Log. They do, however, have different sensors and they function quite differently from a usability standpoint. The FS7 is a full featured digital cinema camera. The a7S is a small format mirrorless camera system (based on a stills camera platform), that is “tuned” for video recording. It’s great for flying on gimbal systems, run and gun work in a small package (with a rig and accessories), and has generally replaced DSLRs for those types of applications in my work. It has great dynamic range, is currently unmatched in low light and has log based recording.
With the above said, the a7S is still “limited” to S-Log2. While it’s amazing to have Log recording in a camera this small and affordable, I find that I’m not drawn to using the a7S as a true B Camera with the FS7. The combination of being forced to shoot log at a minimum ISO of 3200, the lack of built in NDs and not being able to use S-Log3 with a cine style color gamut (which I have outlined above), are the main reasons. You generally use the two cameras in fundamentally different ways which makes using them together less than ideal. We need to move fast in most production environments and when two cameras don’t work the same it can really slow things down and also introduce the chance of mistakes happening on set.
I also find that the combination of the Cine EI Shooting Mode and S-Gamut3.Cine/S-Log3 “Color Space” are giving me results that are much more predictable in post and easier, personally, to work with than S-Gamut/S-Log2. This doesn’t mean that I wouldn’t use both cameras on the same project, but I personally would use them for their strengths and not usually try to match them in the same shooting set up.
What does this all mean? For me it means I would usually recommend using two matching cameras (with identical settings), if at all possible. If the a7S had the same color matrix/gamut combinations as the FS7 that might be different. That said, I could see using different digital cinema cameras (say a C300 Mark II using Canon Log 2/Cinema Gamut and an FS7 using S-Gamut3.Cine/S-Log3), on the same project and shooting charts in production so they can be matched easily in post. It’s all possible in skilled hands but I do feel the right combination of gamut & gamma (along with dynamic range), makes this much, much easier. I think the FS7 could easily be a B or C camera for the F5 (same sensor and gamut/gamma options), but also for cameras like the ALEXA, Amira, C300 Mark II and of course the F55. They won’t match perfectly but there’s enough similarities in there that it’s an option.
THE NOT SO GOOD
I’ve already mentioned a few of the “quirks” of the FS7 in this article. They can be minor things on certain projects and with certain workflows and pretty major on others.
The main downsides of the FS7, for me at least, can be summed up in following list…
1) E-mount lens mount and it’s lack of native lenses (especially ones that aren’t focus-by-wire based).
2) The magnification area isn’t moveable which is frustrating. It’s center of image based only.
3) The lack of white balance presets in “Cine EI” mode.
4) Weak autofocus capabilities (especially compared to Cinema EOS cameras).
5) Losing MLUTs in S&Q mode.
6) Losing the waveform monitor when using MLUTs and the strange functionality of when you can and can’t use MLUTs in HD and 4K recording modes.
I’m assuming the last few are based on processing power. I use an external EVF and/or monitor that allows me to load LUTs into them and also have scopes available to me at the same time (I always set the waveform to a pre-LUT reading so I can set exposure correctly).
Note: While I list the e-mount as a downside to the camera it is also as much an advantage to the system when adapting other lens mounts to the camera due to its short flange distance.
CONCLUSION
At this time, there isn’t anything quite like the Sony FS7 in its price range. At under $8,000 U.S. for the body and under $10,000 for the body & XDCA-FS7 Extension Unit, the FS7 is a whole lot of camera for the money.
What it really boils down to is that I personally prefer simple over complex. And when I say simple I don’t mean that I want things to be easy. I’ve spent a lot of time learning about this and other cameras so that I can find simple workflows that yield consistently good to great results for the type of work I do. If it’s simple but doesn’t produce the desired result then it’s not worth it. I’ll either go the complex route or possibly not use the camera at all. If it’s simple and doesn’t compromise picture quality then that’s a win for production.
The URSA Mini looks to be a VERY interesting camera system but it is also untested. It will undoubtedly produce a great looking image but will lack built in NDs and the flexibility that the FS7 provides in terms of camera features and settings (essentially two cameras in one). It also won’t, with almost certainty, be as good in low light as the FS7. For many shooters, especially in the documentary world, this is very, very important.
The C300 Mark II is also on many people’s radar (including mine), but as mentioned at the beginning of this “review” I don’t necessarily see it as a direct competitor to the FS7 (and I would guess Canon doesn’t either). That camera will come in at around $16,000 U.S. in EF and PL mount options and will have focus control features that we’ve never seen in an S35 digital cinema camera before. It will also have ACES/Rec.2020 support and I really do see the F5 & F55 as the competing Sony cameras to the C300 Mark II.
When people ask me to recommend the right camera system for them to purchase (which happens often), I ask lots of questions related to the types of work that they do and will be doing in the future. If the types of work they do are varied (corporate, doc, narrative, commercial), and aren’t being done with big budgets and large crews then Sony’s cameras are always in the mix. So are Canon’s Cinema EOS cameras (which I use on productions all the time). In the past I have recommended the FS700 to lots of people even though it’s not personally the right camera system for me right now. The FS7 takes that camera to an entirely different level in terms of dynamic range, internal UHD/4K recording and the “Cine EI” workflow which finally gets me away from the “Sony Look” without jumping through hoops to get there.
While I do think there are other cameras out there that are better suited for specific types of work, I also feel that you get a camera system in the FS7 that is good to great for many types of projects. In fact, it’s price point makes it one of the few S35 based digital cinema cameras that you could actually consider buying two of for your productions (if your cameras “work” on a regular basis). It’s rare not to have two cameras nowadays on even simple projects that are just interview based. Clients want to see those two camera angles and having two matching cameras makes life SO much easier in both production and post.
I can see myself recommending the FS7 to a lot of people. It is a very versatile camera system that is built well and has the ability to be used in lots of different production environments. As with any camera you need to learn how it really operates in the real world. Form factor, features and most importantly the image it captures are what help you determine if it’s the right camera for you and the job at hand.
My recommendation would be to rent the camera and go out and shoot something with it. Get used to it’s quirks (which will be different for everyone), and give the Cine EI Log/LUT based workflow a shot (if you don’t already work that way). I think many people will like it.
In closing, I will continue to use the right camera for the job at hand. Right now at least, for UHD and 4K based projects on a tight budget, I think the FS7 could be that camera in a lot of situations.
—
Jem Schofield is the founder of theC47, an online and offline educational resource focused on teaching the craft of video production and filmmaking (with production based workshops taught throughout the United States and abroad). He is a producer, DP, director & educator and also runs The Filmmaker’s Intensive, a program that focuses on the art & science of documentary & narrative filmmaking.
For the past 19 years his production company has produced projects for an ever expanding client base.
Clients include AbelCine, Apple, Inc., Canon U.S.A. Inc., Cineo Lighting, EMI, Manfrotto, Motley Fool, The New York Times, NPR, Quiet Revolution, Scottish Enterprise, TED, Tiffen, Westcott, YouTube & Zeiss.
He also hates referring to himself in the third person!
For more about Jem & his whereabouts visit theC47.com
—
Statement
This was not a paid review by ProductionHUB, 4KHUB, Sony or any other company. No money exchanged hands between myself and any company or manufacturer. I was asked by ProductionHUB if I’d be interested in doing something on the FS7. I was curious about the camera, so I agreed. I had no idea what I was getting myself into!
My curiosity about the FS7 turned into a full on exploration which not only allowed me to learn more about this particular camera but also to delve more in depth into 4K, Log, LUTs and a whole bunch of other stuff I had wanted an excuse to get into for quite some time. I had experience with these things but this allowed me to “dig deep” and really sort some things out. As a producer, DP and also an educator I felt it was the right time for me to do this.
There are now a lot of these types of cameras out there (from different manufacturers), that have Log/LUT workflows. It’s important to understand how it all works. Each camera is “tuned” differently but the basic concepts are the same regardless of the camera. That said, each camera will have it’s own peculiarities in terms of how you use their Log/LUT features. The information in this “article” is generally applicable to many cameras that provide Log recording options. You just need to learn the correct workflow for each camera whether it be an ARRI, Blackmagic, Canon, Panasonic or Sony based camera system.
The content in the above videos, stills and article are copyrighted & owned by Jem Schofield and theC47 (an educational brand focused on teaching the craft of video production and filmmaking). The views here are mine and are based on real world experience. They may differ from other people’s views on using this and other digital cinema camera systems. The purpose of the piece is educational. Hopefully there is valuable information here that will help people regardless of the camera they are using. If you understand the overall concepts here you should be able to go into a higher end Sony camera like the F5 or F55 and feel right at home. You should also have an easy time using other digital cinema cameras like the ARRI ALEXA and Amira and Canon’s C300 Mark II. They won’t be identical in terms of how the camera is set up but their Log curves (Log-C and Canon Log 2), along with their color matrix/gamut options won’t be that much different than what’s covered here.
This content will be available directly on theC47.com and ProductionHUB’s family of web sites. The article and its accompanying videos and stills can be linked to from any other web site but the content should not be copied, downloaded or distributed in any other way (except for personal offline viewing).
Products linked to in this article are to theC47 affiliates (mainly B&H in this case). There is no additional cost to you if you purchase using these links and those purchases help theC47 continue to create free content like this. Everybody wins!
Special Thanks
A huge thanks to Daniel Phakos and Steven E. Smyth for helping me out with the Jersey City video based segments and Daniel Phakos for helping with the studio segments. Thanks to Giuseppe Malpasso for some of the footage from our recent FS7 shoot in Georgia. Also a hat tip to Sony Professional USA for lending me the FS7 for an extended period of time and to Juan Martinez from Sony for taking the time to answer any key questions I had along the way. It’s rare to have this much time with a camera to really figure out what it’s all about.
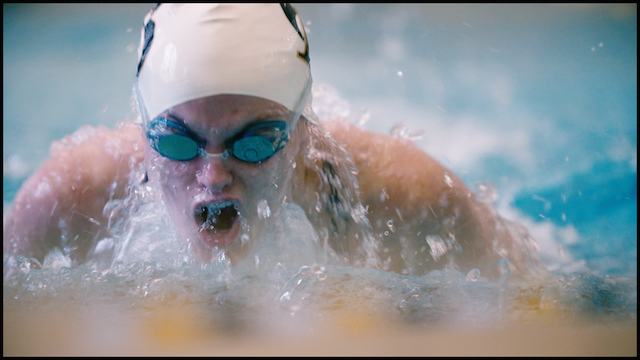
Main image courtesy of: http://thec47.com/about/.